
Windows 7 reached the end of its life on January 14, 2020, which means Microsoft no longer releases security updates for it. If your computer is still running Windows 7, it is exposed to viruses, malware, and new security threats every day, and most modern apps and browsers have already stopped supporting it. Moving to Windows 11 is the safest step you can take, and this comprehensive guide walks you through every part of the process — checking whether your PC can run Windows 11, backing up your files, choosing the right upgrade path, installing the new system, and fixing the problems that most commonly appear along the way.
Before we go further, one honest warning: there is no direct, one-click upgrade from Windows 7 to Windows 11. Microsoft only supports upgrading to Windows 11 from Windows 10. That does not mean Windows 7 users are stuck.
It means you have two realistic paths: upgrade from Windows 7 to Windows 10 first and then to Windows 11, or perform a clean install of Windows 11 straight from a USB drive. Both paths are covered in full below, and the clean install is usually the faster and cleaner option for most Windows 7 machines. If you want the Pro edition specifically, start with our guide on how to download Windows 11 Pro.
Can Your PC Run Windows 11? Check First
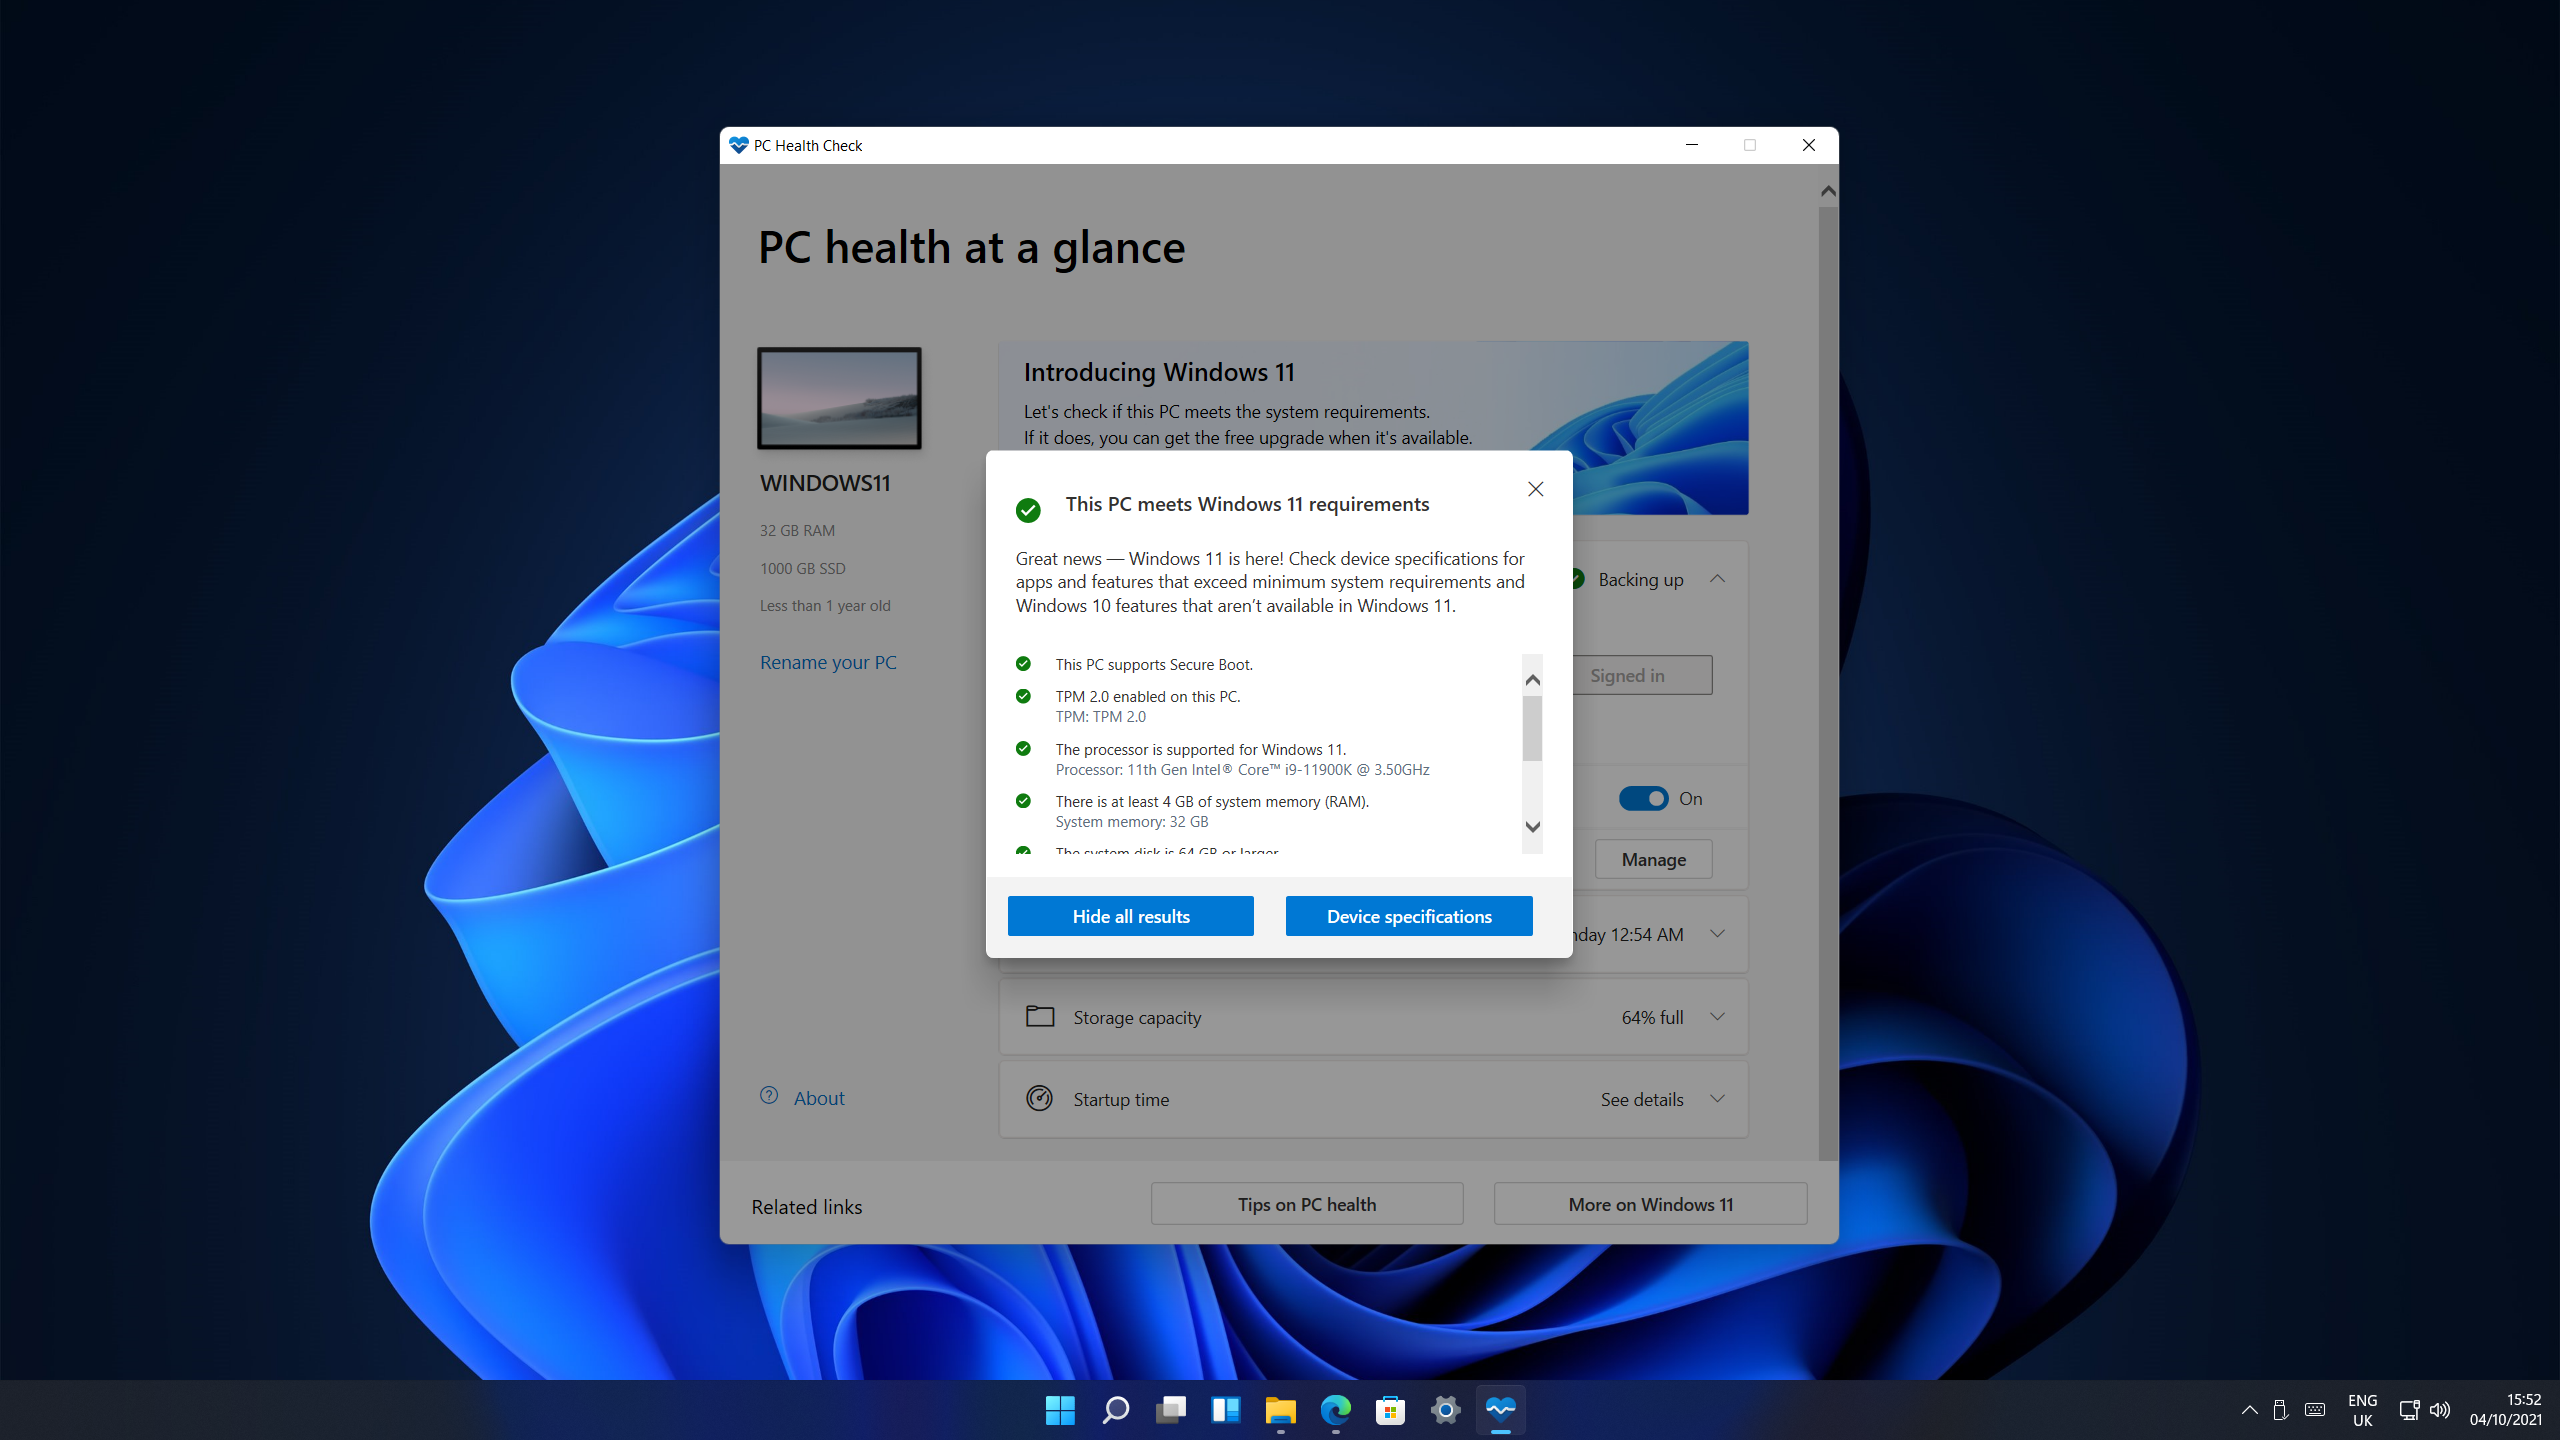
Windows 11 has stricter hardware requirements than Windows 7, and many PCs built for Windows 7 do not meet them. Checking first saves hours of wasted effort. Your PC needs all of the following:
- A compatible 64-bit processor: generally an 8th-generation Intel Core processor or newer, or an AMD Ryzen 2000 series processor or newer, with two or more cores running at 1 GHz or faster.
- At least 4 GB of RAM and 64 GB of storage free.
- TPM 2.0 (Trusted Platform Module) enabled in your firmware.
- Secure Boot supported and enabled.
- UEFI firmware rather than the older legacy BIOS mode.
- A DirectX 12 compatible graphics card with a WDDM 2.0 driver.
- A display larger than 9 inches with at least 720p resolution.
The easiest way to check is Microsoft’s free PC Health Check app. Download it from Microsoft’s website, run it, and click “Check now” under the Windows 11 section. It tells you exactly which requirements your PC meets and which ones fail.
If TPM 2.0 is the only failure, you may be able to turn it on in your BIOS or UEFI settings — restart your PC, enter setup (usually by pressing Del, F2, or F10 during startup), look for a TPM, PTT (Intel), or fTPM (AMD) setting, and enable it. Secure Boot is usually in the same Boot or Security section.
If your processor is too old or TPM 2.0 is missing entirely, Microsoft does not officially support Windows 11 on that PC. Installing it anyway using unofficial workarounds is possible, but Microsoft warns that such PCs may not receive updates, including security updates, and can develop compatibility problems. For a computer that cannot run Windows 11, the practical options are to keep using it offline or for basic tasks, switch to a lightweight Linux system, or replace it with a newer PC.
Before You Start: Back Up Everything
Upgrading an operating system always carries some risk, and a clean install erases everything on the drive. Never skip the backup step. Copy your documents, photos, videos, and other personal files to an external hard drive, a large USB drive, or a cloud service such as OneDrive or Google Drive. Make a list of the programs you use so you can reinstall them later, and gather any licence keys or passwords you will need — for example, your Microsoft Office key, your email account passwords, and any software serial numbers.
Also make sure you know your Windows product key situation. If your Windows 7 PC has a product key sticker (often on the bottom of a laptop or the side of a desktop), take a photo of it. The free upgrade offers Microsoft ran in the past have ended, and Windows 7 keys no longer activate newer versions of Windows, so plan on buying a Windows 11 licence if you do not already have one. You can install Windows 11 without a key and activate later, but an unactivated copy shows a watermark and blocks personalisation settings.
Finally, plug a laptop into mains power, connect to a stable internet connection (the download is around 5 to 6 GB), and set aside at least two hours. Do not start an upgrade on battery power or on a connection that drops frequently.
Method 1: Upgrade from Windows 7 to Windows 10, Then to Windows 11
This is the official step-by-step upgrade path. It keeps your files and programs in place through each step, and it is the best choice when your PC meets the Windows 11 requirements and you want to preserve everything.
Step 1: Upgrade Windows 7 to Windows 10
- Download the Windows 10 Media Creation Tool from Microsoft’s official download page at microsoft.com/software-download/windows10.
- Run the tool and accept the licence terms.
- Choose “Upgrade this PC now” and click Next.
- Let the tool download Windows 10 and install it. Your PC will restart several times. Choose to keep your personal files and apps when asked.
- After Windows 10 is running, go to Settings, then Update and Security, then Activation, and confirm Windows 10 is activated. You will need a valid Windows 10 licence for this step, since the old free upgrade offers have ended.
Step 2: Upgrade Windows 10 to Windows 11
- Open Settings, go to Update and Security (or System, then Windows Update in newer builds), and click Check for updates.
- If your PC is eligible, you will see a banner offering the Windows 11 upgrade. Click “Download and install”.
- If no offer appears, download the Windows 11 Installation Assistant from microsoft.com/software-download/windows11 and run it. It checks compatibility and then upgrades your PC in place.
- Follow the on-screen prompts. The upgrade takes 30 minutes to over an hour depending on your hardware. Your files and most of your apps carry over.
This two-step route is slower than a clean install, but it is the gentlest path for your files and settings, and it is the only officially supported way to move from Windows 7 to Windows 11 while keeping everything.
Method 2: Clean Install Windows 11 from a USB Drive

A clean install erases the old system completely and installs a fresh copy of Windows 11. It is faster than the two-step upgrade, removes years of accumulated junk and possible malware, and usually gives the best performance on older hardware. Use this method if you have already backed up your files or if the two-step upgrade fails.
- On a working computer, go to microsoft.com/software-download/windows11 and download the Media Creation Tool under “Create Windows 11 Installation Media”.
- Plug in a USB flash drive with at least 8 GB of space. Everything on it will be erased.
- Run the Media Creation Tool, accept the terms, choose your language and edition, select “USB flash drive”, pick your drive, and let the tool download Windows 11 and build the bootable USB.
- Plug the USB drive into the Windows 7 PC, restart it, and open the boot menu. The key varies by manufacturer — F12, F2, Esc, and Del are the most common. Select the USB drive to boot from it.
- Choose your language, time, and keyboard, then click “Install now”.
- When asked for a product key, enter your Windows 11 Pro or Home key, or click “I don’t have a product key” to continue and activate later.
- Select the edition of Windows 11 you have a licence for, then choose “Custom: Install Windows only (advanced)”.
- Select the drive where Windows 7 is installed, delete its partitions if you want a completely clean drive, select the unallocated space, and click Next. Windows 11 will install and restart several times.
- Complete the out-of-box setup: region, keyboard, network, Microsoft account sign-in, and privacy settings.
After the clean install, visit Windows Update and install all available updates, then install drivers from your PC manufacturer’s website — especially chipset, graphics, network, and audio drivers. Finally, reinstall your apps and copy your backed-up files back.
Method 3: Download the Windows 11 ISO and Install It Directly

If the Media Creation Tool does not work for you, or you want the installation file itself, download the ISO image instead. On Microsoft’s Windows 11 download page, scroll to “Download Windows 11 Disk Image (ISO)”, select “Windows 11 (multi-edition ISO)”, choose your language, and click the 64-bit download link. The link stays valid for 24 hours.
Once downloaded, you can either double-click the ISO to mount it and run setup.exe (this starts an in-place upgrade if you are on a supported system), or use a free tool such as Rufus to write the ISO to a USB drive and boot from it for a clean install, following the same steps as Method 2. The ISO contains both Home and Pro editions, and you choose the edition during setup.
After the Upgrade: Essential First Steps
Do not stop once Windows 11 is installed. Run Windows Update repeatedly until no more updates are offered — the first round of updates can be large. Check Device Manager for any devices with a yellow warning icon and install the missing drivers.
Sign in to your Microsoft account so your digital licence, OneDrive files, and browser data sync. Open the Microsoft Store and update your apps. Reinstall your essential programs, including a web browser, office software, and antivirus if you use a third-party one (Windows Security is built in and is enough for most people).
Finally, check that your important files survived the move, and confirm activation under Settings, then System, then Activation. Once you are on Windows 11 Pro, turn on BitLocker to encrypt your drive — see how to enable BitLocker in Windows 11.
Tips for a Smooth Move from Windows 7 to Windows 11
Learn the new Start menu and taskbar layout early — the Start button is centred by default, but you can move it back to the left under Settings, then Personalisation, then Taskbar. Explore Snap Layouts by hovering over a window’s maximise button; they make multitasking much easier than the old Aero Snap. Turn on Storage Sense under Settings, then System, then Storage, so Windows cleans up temporary files automatically.
If you miss a Windows 7 feature, check whether it exists under a new name before installing third-party replacements — for example, Windows 11 has a built-in clipboard history (Windows key + V) and a much better screenshot tool (Windows key + Shift + S). Keep your old Windows 7 backup for at least a few weeks after the upgrade, just in case you discover a file you forgot to copy. You can also change the wallpaper in Windows 11 to make the new desktop your own.
Troubleshooting Common Problems
“This PC can’t run Windows 11” during setup. Check the PC Health Check app for the exact failing requirement. Enable TPM 2.0 and Secure Boot in UEFI settings, and make sure your firmware is set to UEFI mode rather than legacy BIOS. If the CPU is unsupported, there is no official fix — you will need newer hardware or an alternative operating system.
The upgrade is stuck for hours. Large upgrades can take a while on older hard drives, especially with a spinning hard disk rather than an SSD. Give it at least two hours before intervening. If the screen has been frozen with no disk activity for a very long time, force a restart and let Windows roll back, then try again with fewer programs running and antivirus temporarily disabled.
Files missing after the upgrade. Check the C:\Windows.old folder — Windows keeps your old installation there for 10 days after an upgrade, and your files are usually inside it under Users and your old username. Copy anything you need out of it promptly, because Windows deletes it automatically after 10 days.
Drivers not working after the move. Visit your PC or motherboard manufacturer’s support page and download Windows 11 drivers for your exact model. For very old hardware, Windows 10 drivers sometimes work on Windows 11, but only install them from the manufacturer’s own site.
Activation fails with an error. Make sure you entered the correct key for the correct edition (a Home key will not activate Pro). If you changed hardware, use the Activation troubleshooter under Settings, then System, then Activation. If you bought a digital licence from the Microsoft Store, signing in with the same Microsoft account usually restores it automatically.
Windows 11 runs slowly on your old PC. The most effective upgrade is replacing a spinning hard drive with an SSD, followed by adding more RAM up to at least 8 GB. Also disable unnecessary startup apps under Settings, then Apps, then Startup, and turn off visual effects under Settings, then Accessibility, then Visual effects. First, check the RAM type in Windows 11 so you buy the right upgrade.
Frequently Asked Questions
Can I upgrade from Windows 7 to Windows 11 for free?
No. The free upgrade offers ended years ago, and Windows 7 product keys no longer activate Windows 10 or 11. Downloading the installer is free, but you need to buy a Windows 11 licence to activate it.
Will I lose my files when upgrading from Windows 7 to Windows 11?
Not if you use the two-step upgrade path and choose to keep your files — but you should still back up first, because upgrades can fail. A clean install erases everything, so a backup is essential there.
Can I upgrade directly from Windows 7 to Windows 11?
No. Microsoft only supports upgrading to Windows 11 from Windows 10. You must either go through Windows 10 first or do a clean install of Windows 11 from a USB drive or ISO.
Is Windows 7 still safe to use?
No. Support ended in January 2020, so security holes discovered since then are never fixed. Modern browsers and apps are also dropping Windows 7 support, and using it online is increasingly risky.
What if my PC cannot run Windows 11?
You can keep using the PC for offline work, install a lightweight Linux distribution, or replace the PC. Installing Windows 11 through unofficial bypasses is possible but not recommended, because Microsoft may withhold updates from such systems.
How long does the upgrade take?
A two-step upgrade (Windows 7 to 10, then 10 to 11) can take three to five hours in total on older hardware. A clean install of Windows 11 usually takes 30 minutes to an hour, plus time for updates and reinstalling apps.
Do I need a Microsoft account for Windows 11?
Windows 11 Home requires a Microsoft account and an internet connection during setup. Windows 11 Pro can be set up with a local account, although a Microsoft account makes activation and syncing much easier.
Conclusion
Moving from Windows 7 to Windows 11 takes some planning, but it is worth it for security alone. Check your hardware with the PC Health Check app, back up your files, and then choose your path: the two-step upgrade through Windows 10 if you want to keep everything, or a clean install from USB if you want the fastest, freshest result. Once Windows 11 is running, install your updates and drivers, restore your files, and enjoy a system that is supported, secure, and ready for modern software. If your PC cannot run Windows 11 at all, treat that as the clearest sign it is time for a newer machine.